 Fitness, Nutrition, Health and Sports Blog In the HSNstore Blog you will find tips about Fitness, sport in general, nutrition, and health – HSNstore.com

The barbell row is one of the fundamental and essential exercises in any hypertrophy or strength routine for developing the back muscles and improving pulling strength. However, due to its technical demands, to make the most of its benefits it is essential to know how to perform it correctly, which muscles are involved and which biomechanical aspects must be controlled to prevent injury.
In this guide, we will analyse the 90-degree barbell row step by step, its variations and how to programme it into your workouts.
| Goal | Ideal bar |
|---|---|
| Difficulty | Intermediate / Advanced |
| Primary muscles | Latissimus dorsi, Rhomboids, Trapezius |
| Secondary muscles | Spinal erectors, Posterior deltoids, Biceps |
| Equipment | Barbell and weight plates |
| Focus | Strength / Hypertrophy (horizontal pull) |
How to do the barbell row?
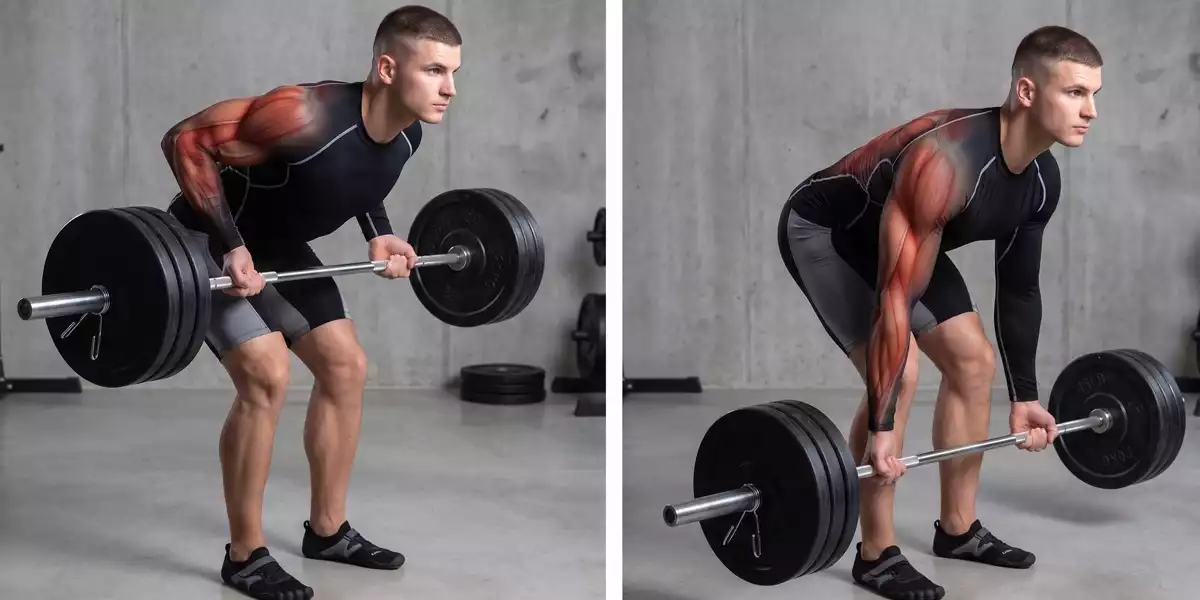
To perform the barbell row correctly and maximise muscle fibre recruitment, follow these steps:
- Starting position: Place your feet approximately hip-width apart or slightly wider, with your toes pointing slightly outwards (at a 30-45º angle). Position the barbell in front of you, over the middle of your feet (instep), close to your shins without touching them.
- Grip: Hold the barbell with both hands using an overhand grip (palms facing towards you). Your grip should be slightly narrower than your bench press grip and slightly wider than your deadlift grip. Wrap your thumbs completely around the bar for greater safety and force transfer.
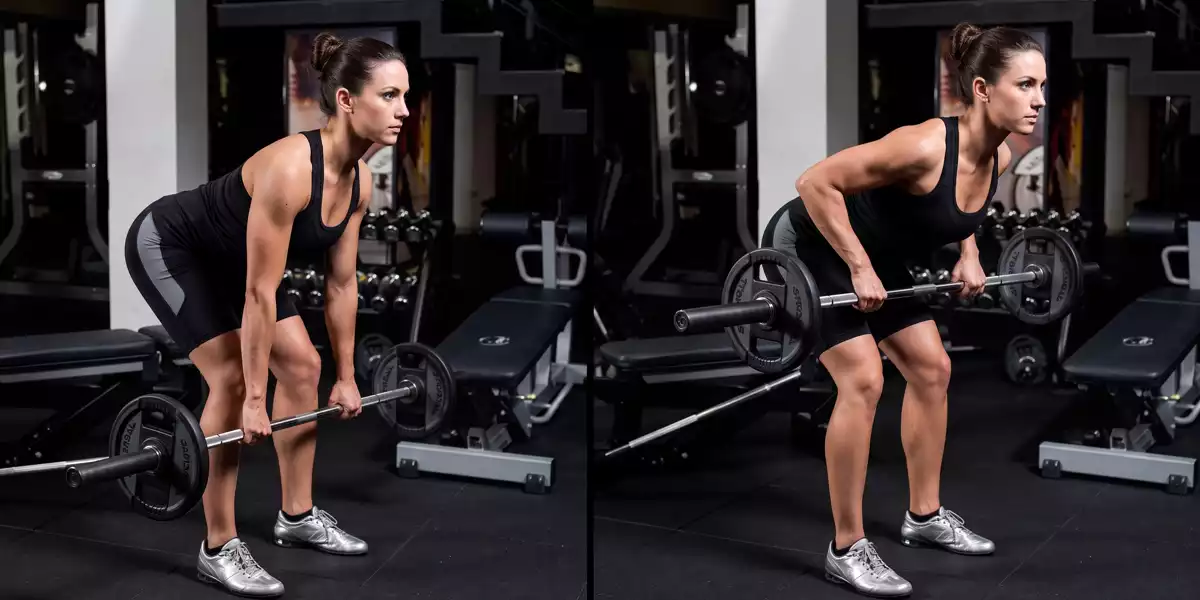
- Torso angle (hip hinge): With your knees slightly bent, lean your torso forwards until it is parallel to the floor (90-degree row). It is essential to maintain the natural curve of your lower back (lordosis) and keep your spine stable at all times.
- The pull (concentric phase): Initiate the movement by driving your elbows backwards and upwards, bringing the bar towards your lower abdomen or navel area. Focus on retracting your shoulder blades (bringing them together) at the top of the movement.
- Eccentric phase: Lower the bar slowly and under control until your arms are fully extended, allowing your shoulder blades to separate again as you prepare for the next repetition.
Biomechanical analysis: Elbows and Wrists
Elbows
The elbows should lead the movement. The barbell row is not about performing a biceps curl. At the end of the full movement, your elbows should finish behind your torso. Keep your elbows extended at the start of the movement to reduce unnecessary stress on the biceps.
Wrists
They should remain completely straight, forming a natural extension of the forearm. They should never be bent, as this would reduce grip strength and significantly increase the risk of injury.
Muscles worked in the barbell row
The barbell row is one of the main horizontal pulling exercises and complements horizontal pushing movements such as the bench press. It involves a large number of muscle groups, both directly and indirectly:
Primary muscles
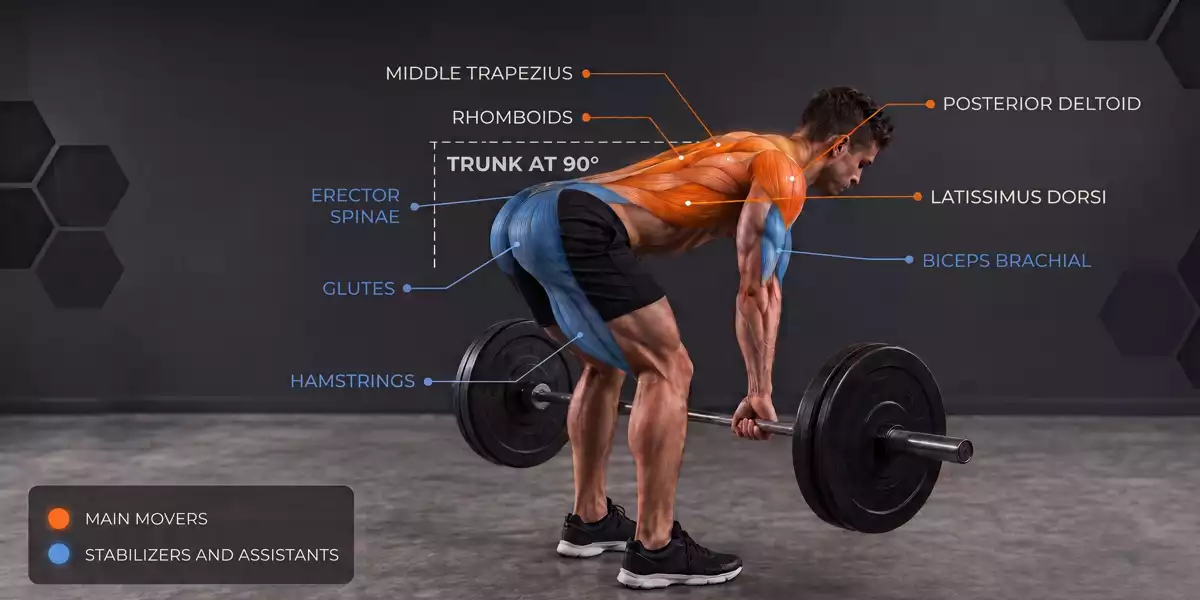
The barbell row primarily works the latissimus dorsi, middle trapezius, rhomboids and posterior deltoids. These muscles are involved in pulling the arms backwards and in the movement and control of the shoulder blades.
Secondary muscles
The biceps brachii acts as an assisting muscle, particularly during elbow flexion. Meanwhile, the spinal erectors, glutes and hamstrings mainly perform a stabilising function, helping to keep the torso and hips stable throughout the exercise.
Barbell row variations
Although the traditional 90-degree row is an excellent exercise, knowing its variations will allow you to target the stimulus according to your goals:
- Bent-over barbell row: A classic variation in which the torso is maintained at an angle of approximately 30 to 45 degrees relative to the floor while the bar is pulled towards the abdomen. It allows you to use moderate to heavy loads and is excellent for developing back thickness, with particular involvement of the latissimus dorsi, rhomboids and middle trapezius.
- Yates Row (underhand grip): Popularised by Dorian Yates, this variation uses a more upright torso position (around 45 degrees) and an underhand grip (palms facing upwards). It involves the biceps and upper trapezius to a greater extent, but requires particular caution to avoid biceps injuries when lifting very heavy loads.
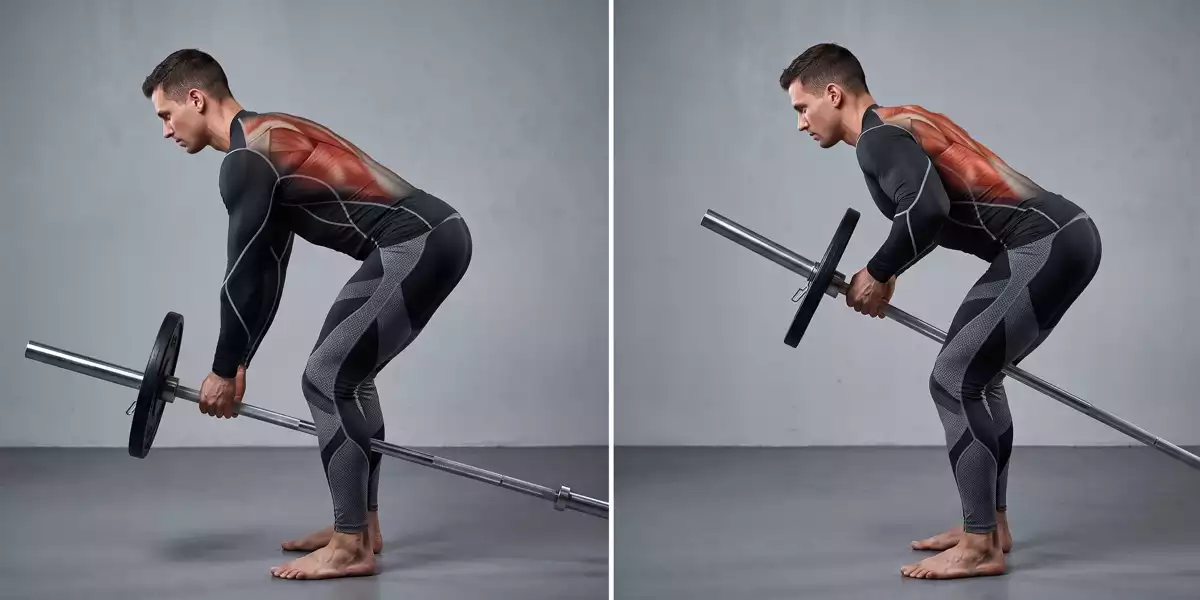
- T-Bar Row: Provides a more guided movement path that can reduce demands on the lower back. It is an excellent option for accumulating training volume when fatigue in the spinal erectors is already high.
How to include the barbell row in your workout routine?
To get the most out of the exercise, you should programme your sets and repetitions according to your main goal.
| Goal | Sets | Repetitions | Rest |
|---|---|---|---|
| Strength | 4 – 5 | 4 – 6 | 3 – 4 min |
| Hypertrophy | 3 – 4 | 8 – 12 | 90 – 120 sec |
| Endurance / Motor Control | 2 – 3 | 15+ | 60 sec |
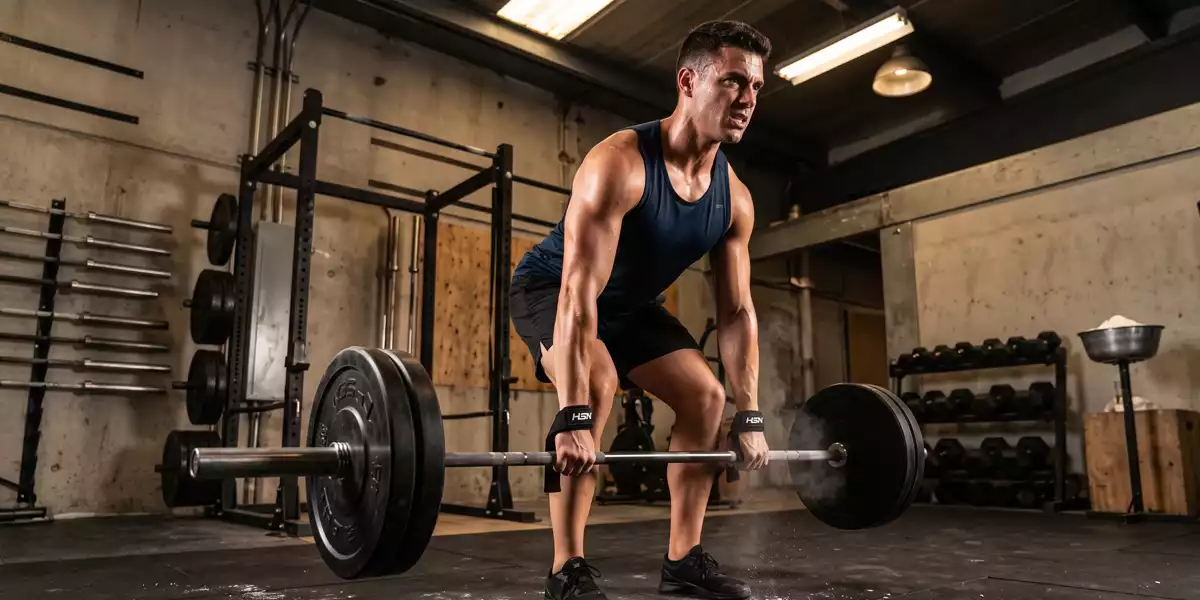
HSN Tip: When training in strength ranges with heavy loads, your grip will often fail before your back muscles do. In these cases, we recommend using Straps or Lifting Straps (available in our accessories section) so that your grip does not limit your training potential.
Common barbell row mistakes
Performing this exercise with poor technique not only reduces its benefits but can also place unnecessary stress on your lower back. Avoid these common mistakes:
- Rounding the lower back: This is one of the most important mistakes to avoid. It often occurs due to limited hip mobility or using too much weight. The back should remain neutral, maintaining its natural curvature.
- Bending the wrists: This occurs when you try to pull the weight with your hands instead of leading with your elbows. If your wrists bend, reduce the load.
- Using excessive momentum (“cheating”): Jerking the weight by extending the hips and knees reduces the work performed by the back muscles. Your torso should not rise more than 15 degrees from the starting position.
- Shortening the range of motion: Failing to bring the bar all the way to the abdomen or fully extend the arms during the lowering phase can significantly limit the exercise’s hypertrophy potential.
Related Posts
- Essential exercises for strong and defined traps.
- Benefits of the rowing machine.
- How to do the lat pulldown?.